前言
在Ubuntu系统下编译Android系统。哎呀不知道是不是换了新电脑的缘故,这次编译居然从安装JDK和配置环境下载源码他喵的一次成功了,想之前真的是那台破电脑一堆问题最后好不容易才成功,不知道是不是跟我这台电脑配置的关系以及内存还有安装ubuntu的时候那几个分区的大小有没有关系。几乎每个分区的大小都是推荐大小的好几倍,尤其是那个交换空间分区不知道是不是。记录一下编译的过程。
安装JDK
编译Android系统需要JDK,可以在命令行安装:
1
| sudo apt install openjdk-8-jdk
|
没有换源,一次成功,有的时候因为墙的原因可能会安装不了可以换阿里的源。
下载源码
下载源码是用的清华的镜像,以下几个步骤:
下载 repo 工具:
1
2
3
4
| mkdir ~/bin
PATH=~/bin:$PATH
curl https://mirrors.tuna.tsinghua.edu.cn/git/git-repo > ~/bin/repo
chmod a+x ~/bin/repo
|
建立工作目录:
1
2
| mkdir android_9.0_r3
cd android_9.0_r3
|
安装python:
1
| sudo apt-get install python
|
初始化仓库:
1
| repo init -u https://aosp.tuna.tsinghua.edu.cn/platform/manifest
|
如果需要某个特定的 Android 版本(列表):
1
| repo init -u https://aosp.tuna.tsinghua.edu.cn/platform/manifest -b android_9.0_r3
|
同步源码树(以后只需执行这条命令来同步):
编译源码
在AOSP的根目录,输入如下的命令:
1
| source build/envsetup.sh
|
选择编译目标:
lunch命令是envsetup.sh里定义的一个命令,用来让用户选择编译目标。
会有以下信息输出:
1
2
3
4
5
6
7
8
9
10
11
12
13
14
15
16
17
18
19
20
21
22
23
24
25
26
27
28
29
30
31
32
33
34
35
36
37
38
39
40
41
42
43
44
45
46
47
48
49
50
51
52
53
54
55
| You're building on Linux
Lunch menu... pick a combo:
1. aosp_arm-eng
2. aosp_arm64-eng
3. aosp_mips-eng
4. aosp_mips64-eng
5. aosp_x86-eng
6. aosp_x86_64-eng
7. aosp_car_arm-userdebug
8. aosp_car_arm64-userdebug
9. aosp_car_x86-userdebug
10. aosp_car_x86_64-userdebug
11. mini_emulator_arm64-userdebug
12. m_e_arm-userdebug
13. m_e_mips64-eng
14. m_e_mips-userdebug
15. mini_emulator_x86_64-userdebug
16. mini_emulator_x86-userdebug
17. uml-userdebug
18. aosp_cf_x86_auto-userdebug
19. aosp_cf_x86_phone-userdebug
20. aosp_cf_x86_tablet-userdebug
21. aosp_cf_x86_tablet_3g-userdebug
22. aosp_cf_x86_tv-userdebug
23. aosp_cf_x86_wear-userdebug
24. aosp_cf_x86_64_auto-userdebug
25. aosp_cf_x86_64_phone-userdebug
26. aosp_cf_x86_64_tablet-userdebug
27. aosp_cf_x86_64_tablet_3g-userdebug
28. aosp_cf_x86_64_tv-userdebug
29. aosp_cf_x86_64_wear-userdebug
30. cf_x86_auto-userdebug
31. cf_x86_phone-userdebug
32. cf_x86_tablet-userdebug
33. cf_x86_tablet_3g-userdebug
34. cf_x86_tv-userdebug
35. cf_x86_wear-userdebug
36. cf_x86_64_auto-userdebug
37. cf_x86_64_phone-userdebug
38. cf_x86_64_tablet-userdebug
39. cf_x86_64_tablet_3g-userdebug
40. cf_x86_64_tv-userdebug
41. cf_x86_64_wear-userdebug
42. aosp_marlin-userdebug
43. aosp_marlin_svelte-userdebug
44. aosp_sailfish-userdebug
45. aosp_walleye-userdebug
46. aosp_walleye_test-userdebug
47. aosp_taimen-userdebug
48. hikey-userdebug
49. hikey64_only-userdebug
50. hikey960-userdebug
Which would you like? [aosp_arm-eng]
|
选择42,按回车。这可以安装到pixel设备(之前的nexus也是)
编译的几种不同的类型:
- user:用来正式发布到市场的版本,权限受限,如没有 root 权限,不能 dedug,adb默认处于停用状态。
- userdebug:在user版本的基础上开放了 root 权限和 debug 权限,adb默认处于启用状态。一般用于调试真机。
- eng:开发工程师的版本,拥有最大的权限(root等),具有额外调试工具的开发配置。一般用于模拟器。
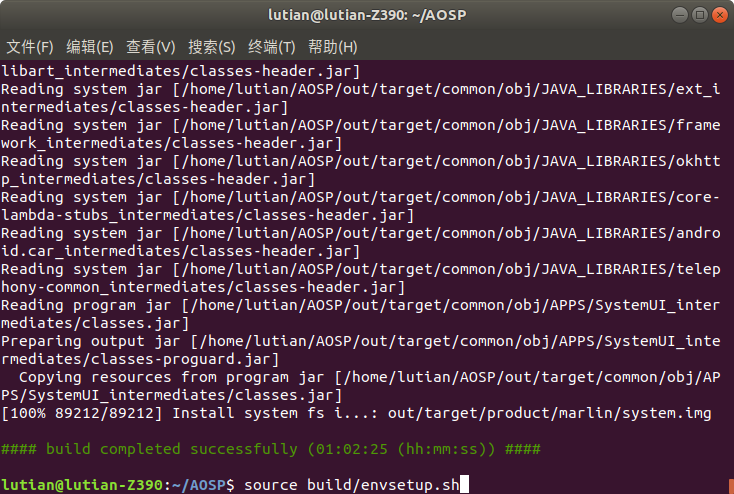
开始编译:
编译好后的状态,会有一个out文件夹,因为只有nexus 6p没有pixel手机了,所以没有刷进手机,想来跟nexus刷这些镜像文件没什么大的区别吧。

一个小时两分钟编译好,想之前用笔记本用了半天还不止。。。
编译后产生的文件:
- system.img:系统镜像,里面包含了Android系统主要的目录和文件,通过init.c进行解析并mount挂载到/system目录下。
- userdata.img:用户镜像,是Android系统中存放用户数据的,通过init.c进行解析并mount挂载到/data目录下。